Understanding how menus and toolbars work across different workspaces in your application is essential for creating an efficient and personalized user experience. This article will guide you through how menus and toolbars behave, and how to customize them using the Customize tool.
📌 Overview: Menus and Toolbars Across Workspaces
In most cases, menus and toolbars are shared across all workspaces within a specific UI group. These include:
🔹 Common Menus and Toolbars
-
Main Menu Toolbar: The primary navigation bar across all workspaces.
-
General Toolbars: Standard tools that apply globally.
-
Right-Click Menus (per grid): Context menus triggered by right-clicking within a grid.
-
Drag-and-Drop Menus (per grid): Actions triggered by dragging entities between grids.
These elements remain consistent across different workspace layouts within the same UI group, ensuring a familiar interface across your environment.
⚠️ Exception: View Toolbars (Grid-Specific)
While most toolbars are shared, View Toolbars behave differently:
-
View Toolbars are stored per grid and are tied to each individual view within a workspace layout.
-
If you remove a grid view from the Workspace Layout Editor, the associated grid toolbar will be permanently lost.
🔄 To avoid losing customized toolbars, always back up your layout or use caution when removing views.
🧰 Using the Customize Tool
The Customize window is your main interface for modifying menus and toolbars. It allows you to tailor the UI to your specific workflow needs.
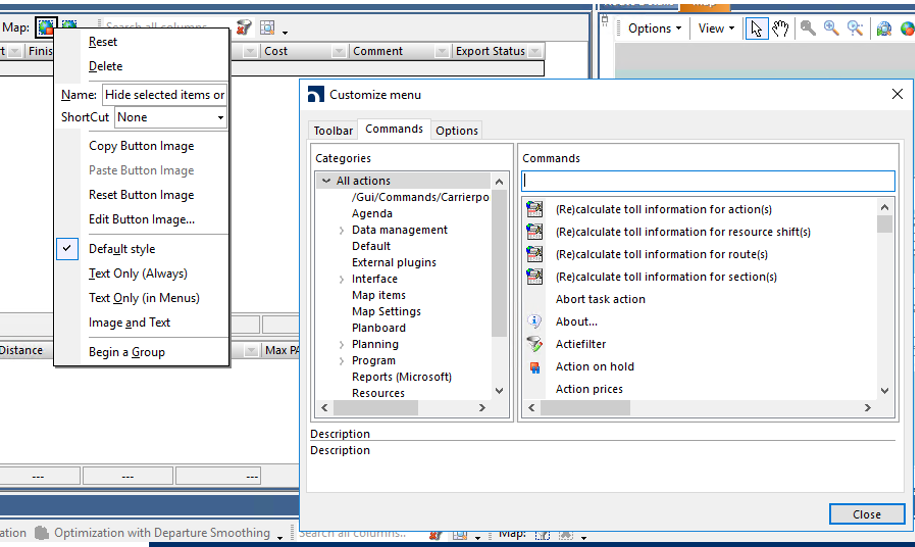
✨ Customize Tool Features
1. Adjust Menus and Toolbars
-
Create new toolbars or submenus.
-
Add or remove commands from toolbars and menus.
-
Organize commands by categories based on functionality.
2. Search Commands
-
You can search for actions within a selected category or choose “All actions” for a full list.
3. Format Buttons and Menu Items
-
With the Customize window open:
-
Right-click on any button or menu item to access formatting options such as renaming, changing icons, or repositioning.
-
🧭 Menu Customization Options
🔹 Main Menu
-
Add new menu items or submenus to the main navigation bar.
-
Use categories to locate and insert actions as needed.
🔹 Toolbars
-
Toolbars can be:
-
Global (general use) across workspaces
-
Grid-specific, tailored to a particular data grid
-
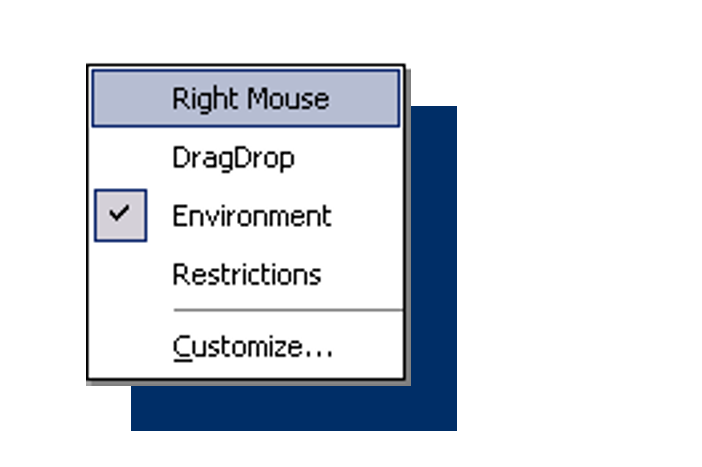
🔹 Right-Mouse Menus
-
Each grid has its own predefined right-click menu.
-
Important: The first option in a right-mouse menu is also the default action when double-clicking on an item in that grid.
🔹 Drag-and-Drop Menus
-
Define what action is taken when dragging an entity from one grid to another.
-
These are available under the "Dragdrop actions" category in the Customize window.
-
This feature is useful for streamlining workflows involving movement of data between grids.
🧠 Best Practices
-
Backup your layout before making significant changes.
-
When customizing grid views or toolbars, take note of which workspace and grid the changes apply to.
-
Be cautious when removing views in the layout editor - any toolbars tied to those views will be lost.
-
Use descriptive names for new toolbars and menu items for easier maintenance.
🆘 Need More Help?
If you're unsure how to proceed or encounter unexpected behavior while customizing, don’t hesitate to open a support ticket and describe the issue in details
Comments (0 comments)